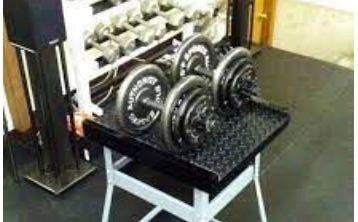
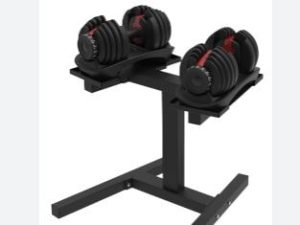
Creating a DIY adjustable dumbbell stand can be a practical and cost-effective solution for organizing your workout space.
Here’s a step-by-step guide to help you build a simple and adjustable dumbbell stand: Diy Adjustable Dumbbell Stand.
Materials Needed:
2×4 wooden boards (length depends on the desired width and height of the stand)
Plywood or MDF board for shelves
Screws
Wood glue
Drill with drill bits
Saw
Measuring tape
Sandpaper
Stain or paint (optional)
Instructions:
Step 1: Design and Measurements
Decide on the dimensions of your dumbbell stand based on the space you have and the number of dumbbells you plan to store. Consider the height, width, and shelf spacing. Sketch a design to guide you through the process.
Step 2: Cut the Wooden Boards
Using a saw, cut the 2×4 boards to the desired lengths for the vertical supports and horizontal shelves. Make sure to cut enough pieces for the number of shelves you want.
Step 3: Assemble the Vertical Supports
Lay out two 2×4 boards for each vertical support, forming an “L” shape. Apply wood glue to the joint and screw the pieces together. Repeat this step for all vertical supports.
Step 4: Attach Horizontal Shelves
Place the horizontal shelves on the vertical supports, evenly spacing them based on your design. Apply wood glue to the joints and secure the shelves with screws. Ensure the shelves are level.
Step 5: Create the Adjustable Mechanism
To make the shelves adjustable, you can use a simple pin or bolt system. Drill holes on the vertical supports at intervals where you want the shelves to be adjustable. Drill corresponding holes on the ends of the shelves.
Insert a pin or bolt through the holes to secure the shelves at the desired height. You can use a cotter pin or a locking mechanism to ensure the shelves stay in place during workouts.
Step 6: Sand and Finish
Smooth the edges and surfaces of your dumbbell stand using sandpaper. If desired, you can apply stain or paint to enhance the appearance and protect the wood. Allow the finish to dry completely before moving on.
Step 7: Organize Your Dumbbells
Once the stand is fully assembled and finished, organize your dumbbells on the adjustable shelves. Adjust the height of the shelves as needed to accommodate different dumbbell sizes.
Your DIY adjustable dumbbell stand is now ready to use! Adjust the shelves according to your dumbbell collection and enjoy a more organized and accessible workout space.
Creating a DIY adjustable dumbbell stand can be a practical and cost-effective solution for organizing your workout space. Here’s a step-by-step guide to help you build one:
Materials Needed: Diy Adjustable Dumbbell Stand
2×4 lumber (8 feet each)
Plywood (3/4 inch thick)
Screws
Wood glue
Saw
Drill
Measuring tape
Pencil
Sandpaper
Instructions:
1. Planning:
Decide on the dimensions of your dumbbell stand based on the number of dumbbells you have and the space available.
Sketch a simple design that includes shelves for the dumbbells and an adjustable feature.
2. Cut the Lumber:
Using a saw, cut the 2×4 lumber to create the vertical supports (legs) and horizontal supports (shelves) according to your planned dimensions.
Cut the plywood into pieces that will serve as the shelves.
3. Assembly:
Lay out the pieces on the floor to visualize the structure.
Attach the horizontal supports to the vertical supports using screws and wood glue to form the basic frame of the stand.
Ensure that the shelves are evenly spaced to accommodate different dumbbell sizes.
4. Adjustable Feature:
To create an adjustable feature, consider using a slot and pin system. Cut slots into the vertical supports at different heights where the shelves can be placed.
Cut small pieces of scrap wood to serve as pins. These pins will be inserted into the slots to support the shelves at different heights.
5. Reinforce and Stabilize:
Add additional screws and wood glue to reinforce all joints for stability.
If the stand seems wobbly, consider adding diagonal braces to strengthen the structure.
6. Sanding:
Sand the edges and surfaces of the stand to remove any rough spots or splinters. This step will give your stand a smooth finish.
7. Finishing Touches:
Optionally, you can paint or stain the stand to enhance its appearance and protect the wood. Allow it to dry completely before placing any dumbbells on it.
8. Testing:
Test the adjustable feature by inserting the pins into different slots and placing dumbbells on the shelves to ensure stability and functionality.
9. Placement:
Once satisfied with the construction, move the stand to its designated workout area.
Remember to take safety precautions while working with tools and materials. Adjust the measurements and design based on your specific needs and preferences. This DIY adjustable dumbbell stand offers a customizable solution for your home gym, allowing you to organize your dumbbells efficiently.
Making a do-it-yourself adjustable dumbbell stand can be a practical and cost-effective solution for organizing your home gym. Here are step-by-step instructions for building a simple, adjustable dumbbell stand:
Materials required:
Plywood sheets (3/4 inch thick):
Determine the size based on the number of dumbbells you want to store and their dimensions.
wooden dowels (1 inch diameter):
These are used to make the adjustable dumbbell racks.
wood screws:
Choose screws that are suitable for the thickness of your plywood.
drills and bits:
A drill is required to drill and fasten the components.
circular saw or jigsaw:
For cutting plywood sheets to the desired size.
Tape measure and pencil:
For accurately marking and measuring your cuts.
sandpaper:
For smoothing the edges and surfaces of wood.
wood glue:
Optional, but may provide additional resistance to your joints.
instructions:
Step 1: Design your stand
1.1. Measure your dumbbells to determine the correct width and height for the rack.
1.2.Draw a floor plan for the rack, including the location of the adjustable dumbbell holders.
Step 2: Cut the plywood
2.1. Cut the plywood panels to your design using a circular saw or jigsaw. You need a base and vertical supports.
Step 3: Create the vertical supports
3.1.Cut the plywood sheets for the vertical supports. They can be rectangular pieces that add height to your stand.
3.2. Sand the edges of the posts to smooth any rough surfaces.
Step 4: Cut and attach the dumbbell holder
4.1. Cut the wooden dowels into pieces to make the dumbbell racks. These should be shorter than the height of the vertical supports.
4.2.Determine the spacing for the dumbbell racks and mark their positions on the vertical racks.
4.3. Use a drill to drill holes at the dumbbell rack markings.
4.4. Insert the wooden dowels into the holes. For extra stability, you can attach them with wood glue.
Step 5: Assemble the bracket
5.1. Attach the posts to the base with wood screws.Make sure they are securely fastened.
5.2. Place the dumbbell supports into the holes drilled in the stand supports.
Step 6: Final touches
6.1.Sand any rough edges and surfaces of the stand.
6.2. Optionally, you can paint or stain the stand to give it a more elegant look.
Step 7: Test support
7.1.Place your dumbbells on the racks, making sure they are secure.
Congratulations! Now you have a DIY adjustable dumbbell stand. Adjust the pins to the size of your dumbbells as needed. Make sure the stand is stable and secure before using it for your workout.


